Team & Workspace Setup
Create your workspace, invite team members, manage roles, configure organization-wide settings, and understand license pooling.
A workspace is your organization's shared Optiverse environment. It's where team members collaborate, share recordings, and benefit from unified settings and pooled resources.
Creating a Workspace
The first person to sign up from your organization creates the workspace. After that, others can join via:
- Invitation: An admin sends them an email invite from the team page
- Domain auto-join: Anyone with a matching email domain joins automatically when they create an account
- Shared link: During onboarding, share the workspace link and users sign in to join directly
Users are never forced into a workspace. They have to proactively create an account and join. Adding someone to the SSO group in Microsoft or Google does not send them a notification.
Inviting Team Members
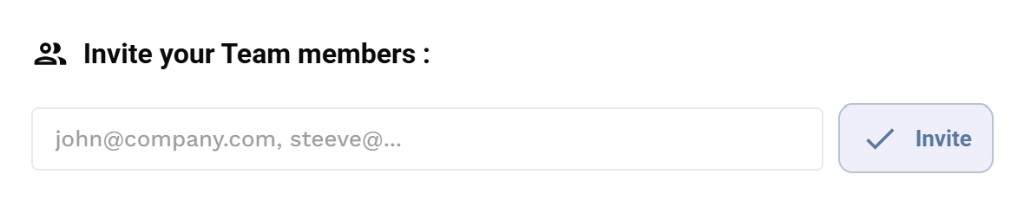
To invite colleagues to your workspace:
- Go to Settings → Organization → Team
- Enter their email addresses (you can add multiple, separated by commas)
- Click Invite
- They'll receive an invitation to join your workspace
You can invite people with different email domains (e.g., contractors or agency partners). They don't need to be on the same domain.
Domain auto-join
If you want anyone with your company email domain to join the workspace automatically without needing an invitation, enable the "Allow domain members to join workspace" toggle from Settings → Organization → Profile.

When enabled, any user who signs up with a matching email domain (e.g., @yourcompany.com) is automatically added to your workspace.
Roles
| Role | Capabilities |
|---|---|
| Owner | Full control over the workspace, billing admin, can transfer ownership. Multiple owners allowed. |
| Admin | Everything a member can do, plus: manage licenses, set org-wide settings, manage integrations, invite/remove users, view all usage statistics |
| Member | Use Optiverse, manage own settings, record and share meetings, view own usage |
Admin Team View
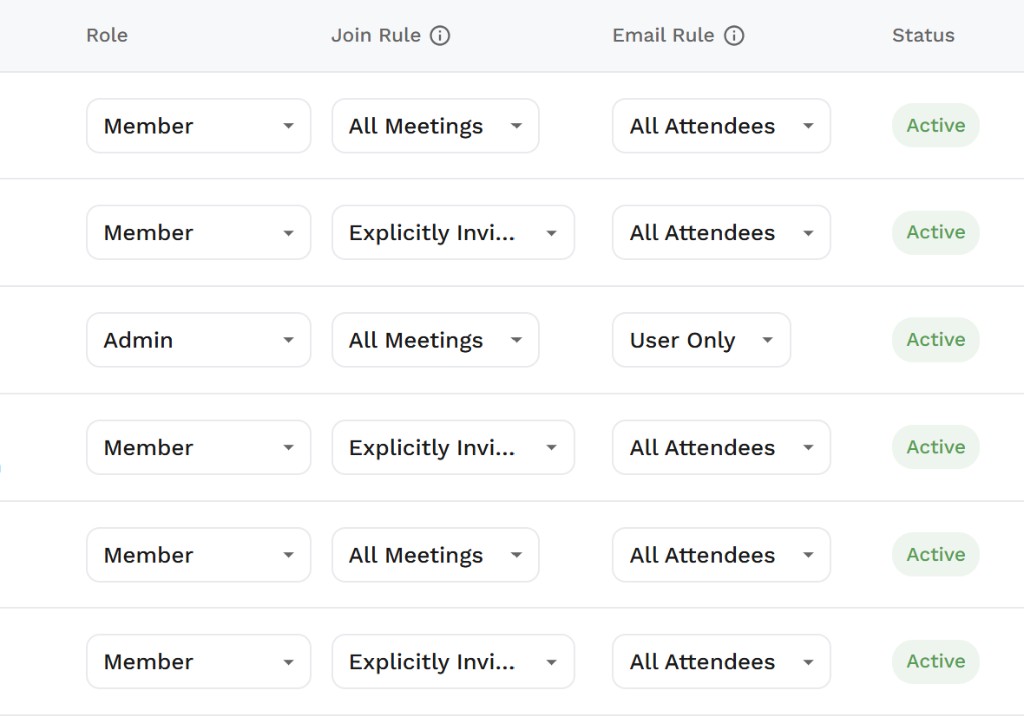
From the Team page, admins and owners can see a table of all workspace members with their current settings. The columns visible per user are:
| Column | What it shows |
|---|---|
| Role | Member, Admin, or Owner |
| Join rule | How the bot joins meetings on behalf of this user (All Meetings, Explicitly Invited, etc.) |
| Email rule | Who receives the email summary after this user's meetings (All Attendees, User Only, etc.) |
| Status | Whether the user is Active |
Overriding individual settings
Admins can modify any user's settings directly from this table at any time. This is useful when:
- A user has an unexpected setting and is confused about bot behavior
- You need to troubleshoot why an email was sent to the wrong people
- You want to quickly audit the entire team's configuration
If someone reports unexpected behavior (e.g., "the bot joined a meeting it shouldn't have" or "the email went to the wrong people"), go to the Team page, find their row, and check their join rule and email rule. This will immediately explain what happened.
Organization-Wide Settings
Admins can configure defaults that apply to all workspace members from Settings → Organization → Profile.
Organization-wide settings always override personal user settings. When an admin locks a setting, individual users cannot change it and will see "This is managed by your admin" on their settings page.
Email recap policy
Set who receives email summaries for the entire organization:
- All invitees: Everyone in the meeting receives the email summary, including external participants
- My organization members: Only members from your organization who were in the meeting receive it
- Only participants with an Optiverse account: Only attendees who have an Optiverse account receive it
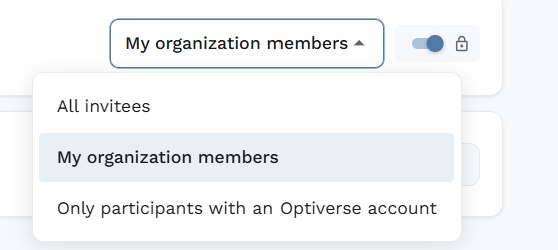
You can also lock this setting (toggle the lock icon) so individual users cannot change it.
Organization agent name
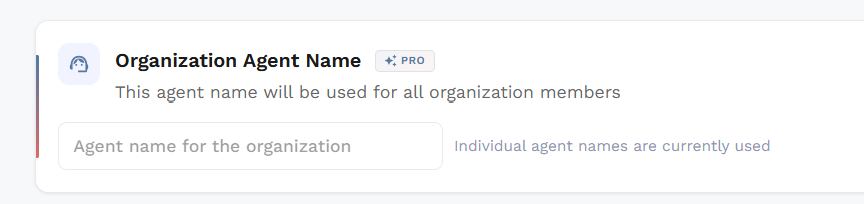
Define a bot name that applies to all users in your workspace (e.g., "YourCompany AI assistant"). If set, this overrides all individual user names.
If you leave this empty, each user can customize their own agent name from their personal settings. The field will show "Individual agent names are currently used."
Guest link access
Controls whether non-Optiverse users can view recordings via a shared link (public link sharing):
- Enabled: Anyone with the meeting link (from the email) can view the recording without needing an Optiverse account
- Disabled: Only users with Optiverse accounts can access recordings

This setting works at both the organization level (default for all meetings) and the per-meeting level (override for individual recordings).
When guest access is enabled, the link in the email uses an access token. It's not a fully public URL, but anyone who receives the link can view the recording without logging in.
Custom dictionary
Add terms to improve transcription accuracy. Include industry-specific words, product names, abbreviations, or acronyms that the AI might not recognize correctly.
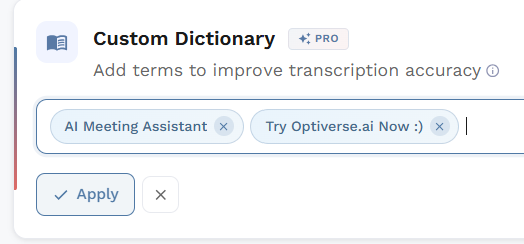
Type each term and press Enter to add it. Click Apply to save your changes.
Meeting recording output
Admins can choose what internal meetings capture: Video or Audio only.

When set to Audio:
- Only audio is captured in all meetings
- Meeting pages show audio playback without video
- This cannot be overridden by individual users
SSO and Access Control
All login goes through Microsoft or Google SSO. There is no way to bypass this with a manual email entry.
This means:
- Removing access is as simple as revoking the app in your Azure/Google enterprise console
- Group access is fully supported on the Microsoft side, including nested groups
- No separate user management needed on the Optiverse side for access control
License Management
Pooled resources
Licenses and meeting minutes are pooled across the entire workspace, not limited per user. For example:
- 10 users × 15,000 minutes each = 150,000 minutes shared across all 10 users
- If one user is more active and another is less active, the balance evens out naturally
This is similar to Microsoft cloud storage pooling. No individual user hits a limit as long as the workspace has capacity.
Available licenses and upgrading
At the top of the Team page, admins can see how many licenses are available and manage them.

Click Manage Licenses to upgrade your plan or add more licenses. See the Pricing page for available plans.
Assigning and unassigning licenses
Licenses are not attached to specific users. If someone leaves your organization or no longer needs Optiverse, you can reassign their license immediately.
To unassign a license, click the three dots (⋯) next to the user's profile on the Team page:
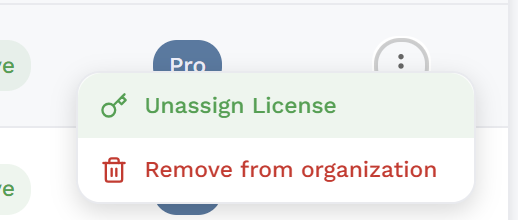
- Unassign License: Frees up the license for another team member
- Remove from organization: Removes the user entirely from your workspace
License types
| License | Features |
|---|---|
| Free | Limited recordings and features |
| Pro | Full access to all core features |
| Business | Pro features + Salesforce integration and advanced controls |
What happens when you reach your limits?
If your workspace reaches its storage or minutes limit, you have several options:
- Bulk delete meetings: It's easy to select and delete multiple recordings at once to free up space. See Deleting Recordings for how to use bulk selection.
- Auto-delete policies: Organizations can set meetings to be automatically deleted after 6, 12, or 18 months
- Assisted cleanup: Our team can help you bulk delete recordings using smart keyword search across meeting titles. Reach out to support@optiverse.ai
- Pay-as-you-go: If you want to preserve all your meeting knowledge and keep recordings accessible, you can activate pay-as-you-go usage beyond your plan limits
You're never locked out or forced into an upgrade. These are simply options to manage your workspace the way that works best for your team.
Usage Statistics
For admins
Admins can see workspace-wide usage from Settings → Organization → Usage, with summary cards at the top and a per-person breakdown below:
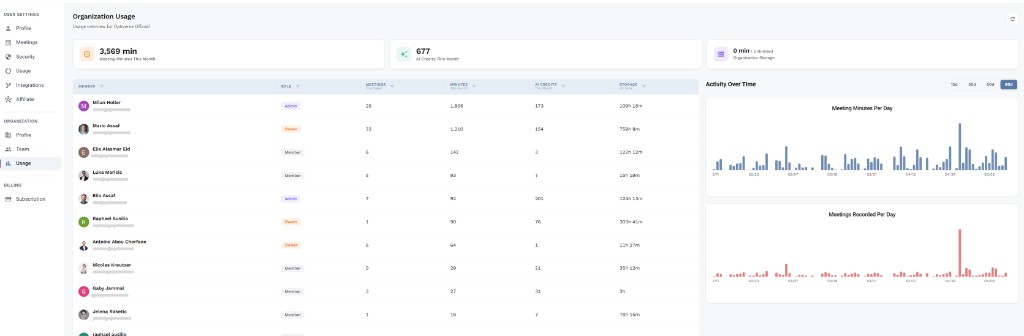
The dashboard shows:
| Metric | What it tracks |
|---|---|
| Minutes | Total meeting minutes processed per user |
| AI credits | AI processing usage (summaries, OptiAgent queries) |
| Storage | Storage consumed by each user's recordings |
The right panel shows Activity Over Time with charts for meeting minutes per day and meetings recorded per day, helping admins spot trends and plan capacity.
Admins can also see the Organization Storage total in the top-right corner.
For individual users
Each user can see their own consumption from Settings → Usage, showing percentage gauges for Meeting Minutes, AI Credits, and Storage, along with historical usage over time.
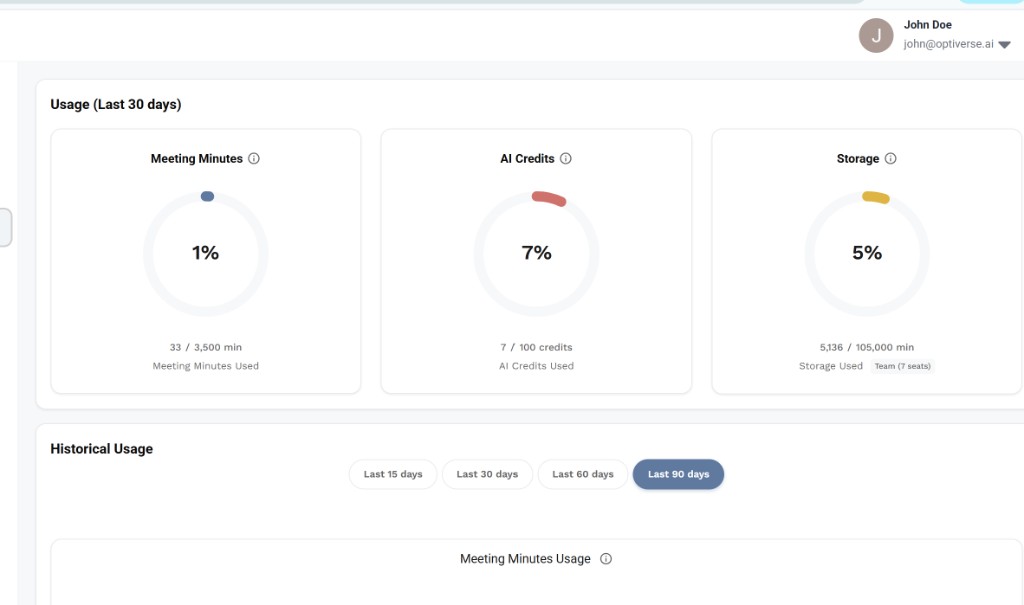
Individual users cannot see other users' statistics.