Creating Custom Protocols
Build protocol templates using AI generation, PDF attachments, manual editing, or the template library.
Optiverse provides multiple ways to create protocol templates, from fully AI assisted generation to complete manual control. Choose the method that matches your comfort level and how well defined your requirements are.
Getting Started
- Go to the Protocols page in Optiverse
- Click Create New Protocol

- Choose your creation method

Method 1: AI Powered Generation
Describe in natural language what type of meeting the protocol is for and what output you need. The AI assistant generates a complete template structure with sections, instructions, and appropriate output data types.
Example prompt:
I need a protocol for client onboarding calls. I want to capture the client's main goals, the agreed timeline, a table of deliverables with owners and deadlines, and any open questions that need follow up.

Attaching Reference Documents
You can attach PDFs to provide additional context to the AI. This is particularly useful when:
- You have an existing meeting template or form you want to replicate in Optiverse
- You have a CRM structure or documentation standard the output needs to match
- You want to provide examples of what good output looks like
The AI reads the attachment and uses it to understand your structure, terminology, and requirements, then builds the protocol accordingly.
The AI assistant may ask clarifying questions before generating the template. Answering them produces a more accurate result on the first try.
After Generation
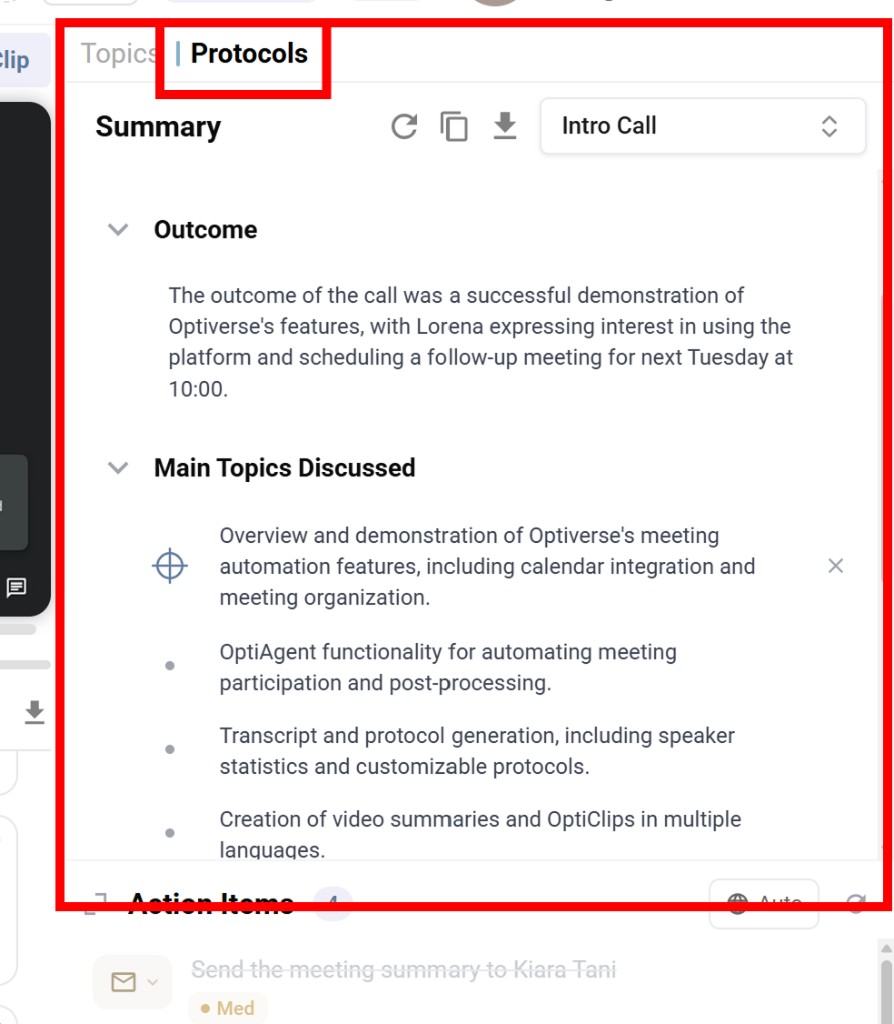
The AI generated protocol is a starting point. You can (and should) review each section and refine the instructions, adjust output types, add or remove sections, and tweak the global description. Most protocols reach their ideal state after 2–3 rounds of testing and refinement.

You can also continue modifying the protocol template inside the editor using natural language with the AI assistant on the right side of the screen. Simply describe what you'd like to change and the assistant will update the template accordingly.
Method 2: Manual Build
Build your protocol section by section with full control over every aspect. Add sections one by one, defining the title, AI instructions, and output data type for each.
This method is ideal when you know exactly what structure you want and prefer to control every detail from the start.
Section Structure
Each section has three components:
| Component | What It Does |
|---|---|
| Title | The heading that appears in the generated output |
| AI Instructions | The prompt telling the AI what to extract or analyze |
| Output Format | The data type for this section's output (text, list, number, options) |

Output Data Types
For each section, you choose an output format. This controls both what the user sees on the recording page and what data structure is sent to integrations.
Text. Free form text response. The AI writes a paragraph or short text answering your prompt. Best for meeting summaries, context descriptions, and decisions explained in prose.
Number. A single numeric value extracted from the meeting. Best for budget amounts, headcount figures, scores, or ratings. When you push protocol output to a CRM or external system, a numeric field requires a numeric value, not a sentence containing a number. The Number type ensures the data matches the expected input format.
Bullet Point (List). A structured list where each item is a discrete data point extracted from the meeting. Best for action items, key takeaways, discussion topics, and decisions. Each item includes an embedded link to its source in the transcript and video, so you can click any item to jump to the exact moment it was discussed.
List of Options (Predefined). A value selected from a list of options you define in advance, similar to a dropdown. Best for deal stage classifications, meeting sentiment, follow up priority, or any Yes/No/Maybe type output. If your CRM or task management tool has a dropdown field with specific allowed values, this type ensures the protocol output matches exactly, with no free text variations that would fail to map.
Global Description
The Description field at the top of the protocol applies instructions across ALL sections. Use it for rules that should be consistent throughout the entire summary.

Examples of global instructions:
- "Always normalize company names to their official spelling."
- "Use formal tone throughout. Output in English regardless of meeting language."
- "When referencing people, use their full name on first mention and last name only thereafter."
Instructions in the global description apply to every section. Instructions within a section apply only to that section. Use both levels strategically for maximum precision.
Method 3: Template Library
Browse ready made protocol templates in the Protocol Gallery and add them to your workspace with one click. Each template is designed for a specific meeting type or use case.
After adding a template from the library, you can customize it to match your exact needs. Adjust sections, rewrite instructions, change output types, or add new sections.
This is the fastest path to a working protocol when a template exists for your use case.
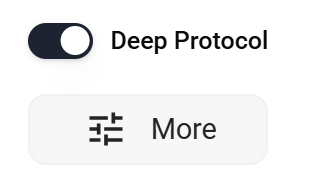
Choosing Simple vs. Deep Analysis
When creating a protocol, you choose between two processing modes:
| Simple (Normal) | Deep Analysis | |
|---|---|---|
| Processing time | Seconds | 1–2 minutes |
| Best for | Quick overviews, high level extraction | Detailed analysis, complex data extraction |
| Output formats | Text, lists, numbers, options | All of the above + tables, formatted text |
| Instruction depth | Concise prompts | Extensive, detailed prompts |
| Recommended for | All users | Experienced prompt engineers |
Start with a Simple protocol while iterating on your structure. Once you're satisfied with the sections and instructions, switch to Deep Analysis if you need richer output. This saves processing time during the refinement phase.
Configuring Your Protocol
Output Language
- Meeting language (default). The summary matches whatever language was spoken.
- Fixed language. Force output in a specific language regardless of meeting language.
Duplicating Protocols
Use the Duplicate button to create variants. For example, duplicate a protocol and change only the output language to create a French version of your English template.
Testing Your Protocol
- Go to any existing recording
- Select your new protocol from the dropdown
- Click Generate to test it
If the output isn't what you expected, go back to the editor, adjust instructions, and regenerate. Iteration is normal, and most protocols reach their final form after 2–3 rounds.
Tips for Better Protocols
- Be specific in your instructions. Instead of "summarize the meeting," write "extract the top 3 decisions made, including who made them and the reasoning discussed."
- Match output types to your integration needs. If a CRM field expects a dropdown value, use the predefined options type. If it expects a number, use the number type.
- Test on diverse meetings. A protocol that works for one meeting may need adjustment when applied to meetings with different participants, topics, or lengths.
- Use global instructions for consistency. Tone, language, naming conventions, and formatting rules belong in the global description.
Protocol Examples
Quick Standup Protocol (Simple)
| Section | Output Type | Instruction |
|---|---|---|
| Updates | Bullet Point | Extract what each person shared as their update or progress since last meeting |
| Blockers | Bullet Point | List any blockers or issues raised by team members |
| Next Steps | Bullet Point | Capture action items with the person responsible |
Sales Call Summary (Simple)
| Section | Output Type | Instruction |
|---|---|---|
| Prospect Need | Text | Summarize the main need or pain point expressed by the prospect |
| Deal Stage | List of Options | Classify the deal stage: Discovery / Demo / Proposal / Negotiation |
| Budget Mentioned | Number | Extract the budget figure if one was mentioned, otherwise output 0 |
| Next Steps | Bullet Point | List agreed next steps with owners |
| Overall Sentiment | List of Options | Classify the overall tone: Positive / Neutral / Negative |
Client Meeting (Deep Analysis)
| Section | Output Type | Instruction |
|---|---|---|
| Executive Summary | Text | Comprehensive overview of the meeting with context, outcomes, and tone |
| Topics & Decisions | Table | Columns: Topic, Discussion Summary, Decision Made, Owner, Deadline |
| Risk Factors | Bullet Point | Identify risks, concerns, or red flags raised, explicitly or implicitly |
| Relationship Health | List of Options | Classify: Strong / Stable / At Risk / Critical |
| Detailed Next Steps | Table | Columns: Action, Responsible Party, Deadline, Priority, Dependencies |